Solar Awning Rebuild

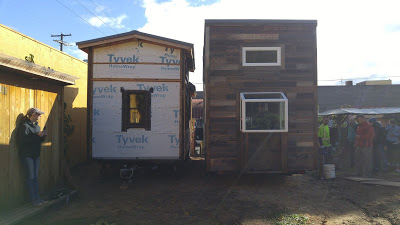
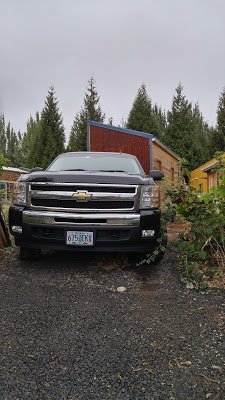
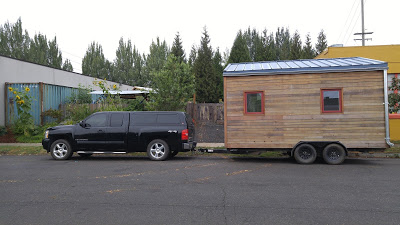
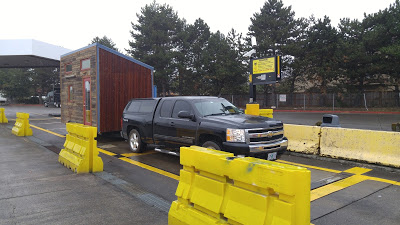
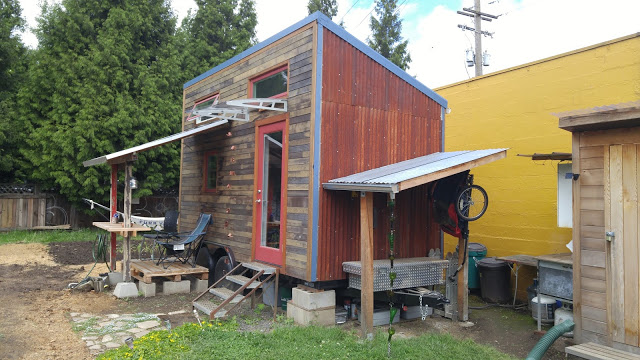
Before I moved my home this summer, I disconnected my solar panels and disassembled the wooden support structure in order to transport them unattached to my home. Once settled into my new site, the plan was to build a new support structure with aluminum so that the awning could fold down and be structurally safe while attached during transport.

The design for the new frame is similar to the old one, trading 2x2 cedar supports for 1 1/2" x 1 1/2" and 1 1/2" x 2 1/2" aluminum C channel. I drilled holes in the bottom of each section of channel to align with the holes in the solar panel frames. In more typical residential solar installs, special rails and hardware clamp the panels in place but I was looking for a lower profile design since I had just under 2" depth to play with. I placed the narrower channels in the middle and wider ones on the outside since they would also accommodate the vertical support posts.

With all of the holes drilled, I went to work attaching them with bolts, nuts, washers and lock washers to the piece of 2" unistrut tube that was already attached to my house via welded on hinges, a piece of angle iron and all-thread. Of course I had to measure to make sure their placement would line up with the spacing of the holes in the solar panel frames. I also didn't tighten things down completely since it's a good idea to wait until everything is in place just in case a little extra wiggle room is necessary.
With the help of a friend and with the channels in vertical position, we lifted the lower solar panel in place, balancing it in one hand while securing it with the bolt hardware with the other. Not an easy task! Eventually we got the four corners attached so we could install the upper panel. For this one, we decided to hinge out the awning, supporting it with a ladder and some blocks so that we could use gravity to our benefit. It was a little bit of a challenge to get in place but much easier to install the bolt hardware. We installed the remaining hardware, then tightened everything down feeling good about that progress.
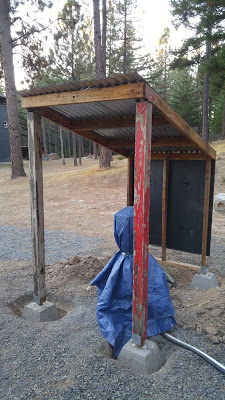
With daylight fading, I postponed installing the vertical posts until another time, so we lowered the awning to a vertical position until then.
Once ready to install the posts, I evaluated the angle I wished to set the panels at knowing that the ideal angle for Oregon is somewhere around 35 degrees. I had 45 degree angles cut in the 2"x2" aluminum tube posts so with the help of my reciprocating saw and angle grinder, I modified the angle to make it closer to 35 degrees. In hindsight, I should have just had them cut it to that measurement. Anyway...

A friend suggested two bolts per attachment to the rail for better stability so I drilled two holes in line on the angled end of the tube and then one for the bottom bolt attachment. I decided to use an L bracket screwed to a 12"x12"x3" concrete block as the base for each post.
With all of the holes drilled in each section of aluminum tube, I lined up each post with the mounting spot on the rail and made marks for holes. Then I drilled the holes and installed the bolts, washers and nuts to make the rail and base connections.
All that was left then was to make the wiring connections. Part of me wishes I had left the wire running through the wall of my house because it was difficult to feed it back through. Of course cold weather and hands didn't help either! Eventually I succeeded, capped the ends and waited until dark to make the panel lead and charge controller connections. For those of you who don't know, solar panels collect sunlight and make energy even when they aren't plugged in so you have to be careful with the ends which is why I waited until dark.
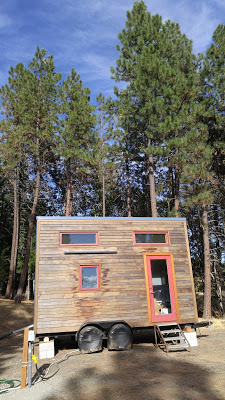
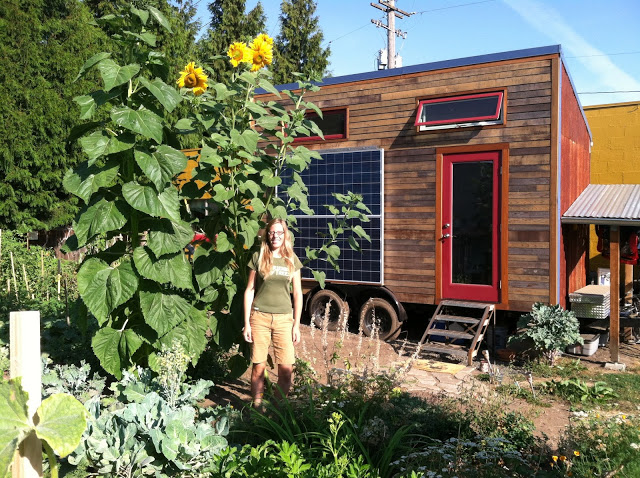
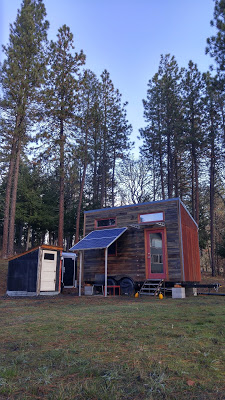
I am excited to have my solar system back together again! More photos on flickr too :)

Winterizing: Utility Shed Build

One of the reasons I chose my new site was that it was pretty much ready for me to hook up and live. What I didn't realize was that I would need to build a structure to help protect my power, water and septic connections from cold, snowy periods during the winter time. Luckily I was able to scavenge used building materials from site, along with some extra 2x4s I had lying around, the shed roof I had installed over the tongue of my trailer at my last site along with the concrete pier blocks and extra fasteners left from my house build. I did buy a used door from the ReBuilding Center, new backer rod and caulk which put the total material cost at around $30.

Since I already had a pre-assembled roof component, I used that as a reference for setting my foundation. I dug out the four corners so the pier blocks could sit on native soil and be backfilled to ensure a solid foundation. Then, I installed the two vertical 4x4 posts (my old solar awning support posts) on the pier blocks at the taller end of the shed. Next, I built the shorter end wall with 2x4s and the black ABS-like sheet material (from a previous skate ramp on site) and installed it spanning the other two pier blocks. Luckily the roof was light enough to pick up and set atop these vertical supports without too much struggle. Once in place, I double checked plumb and level and then secured with screws.
I moved on to frame the side walls in place and attached the panels. The panels were a little tricky to work with since they weren't perfectly square or the same size and I didn't have a good way or the patience to make them uniform so aesthetically they are a little funky but they function.
The next step was to build the frame for the door with a smaller rough opening since the door I bought didn't have a jamb and I didn't feel like buying or building one for this custom size. The door I bought was actually taller but had a cutout for a pet door so I cut off that lower section. That made it just about the perfect height for my structure, though the handle is a little low (more funkiness). I learned that the square strength from panel doors comes from the side stiles and the top and bottom rails and was advised to add a piece of sheet good to span the lower two rails and panel.
With the frame built, I screwed it in place and then went to work hanging the door. It's a little more difficult to hang a door without a jamb, especially by yourself, but I have learned to use other materials as support. Some shimming required.
With the door in place, I used backer rod and caulk to seal up the seams, then backfilled in around the perimeter. Inside, I plugged in a work light, installed a hose hook to hang my second water hose (for rinsing things off and cleaning my toilet), added a lock box with an extra key to my house (been thankful to have had this more than once), hung my mailbox and owl lantern.
On the outside, I added my solar lantern to help navigate at night!
Additional steps I may be taking are installing a frost free hydrant on the water line, adding insulation to exposed fittings and switching over to a heated water hose during colder conditions. The other option is draining the water from the lines and turning it off during freezing temperatures but I'm not sure that I want to go that route since it will likely be a longer period of time than the week or so of frozen hose I had experienced in Portland. I also thought about skirting my house but getting a tight seal is near impossible to do and I don't want to create a home for critters. Plus, I spend most of my time at home in my loft so am not standing on the cold floor. Stay tuned for winter weather living updates!

New Toilet!

Before moving to my new space, I knew that I would not have access to a flush toilet, that a humanure system might be tricky to set up and then move in a year, and that I would have access to the septic system. The landowners suggested I look into the RV setup. I did and learned that it is somewhat spatially complex with toilet, blackwater and greywater holding tanks, etc. It would have been much easier to design the house with those things in mind, especially in my case since I decided to have a wet bath and thus no floor or wall penetrations other than the shower drain and ventilation fan. This setup also prevented me from installing the fancier (and expensive) composting and incinerating toilets. So then what?

While doing a craigslist search for something completely unrelated to toilets, I came across an ad for a portable toilet. While I wasn't excited to buy a used toilet from someone I didn't know, I was curious to learn more about this toilet setup. After reading more about portable toilets, I wondered why I hadn't heard about them before from other tiny housers. Maybe they didn't know about them either.

There are a few different brands and styles of portable toilets. The one I chose is the Thetford Porta Potti Curve due to several factors.
1. It has a taller, sleeker, curved shape design unlike the shorter, basic, squarer shaped ones.
2. It has the largest waste compartment I found, holding 5.5 gallons. That means cleaning it less often.
3. It has indicators that relate to the fill levels of both the waste and the freshwater tanks.
4. It has a battery powered flush vs. a bellows flush.
5. It has well designed handles that make carrying it easy as both individual parts or as a single unit.
6. It has a pour out spout to make emptying easier
7. It has an integrated toilet paper holder compartment. How cool is that!
8. It is odorless due to the holding tank sealed slide valve.
9. It is durable. While carrying it to empty, I slipped going down my metal stairs in the rain and dropped it on a compacted gravel surface. I worried that it had cracked but it just got scuffed up a little bit thankfully.
10. It is cost effective. I bought mine off of amazon for around $125.
Laura's Blog
Now that I have been using it for a couple of months, I thought it would be appropriate to do a review. So far, so good! Since I am away at work during the day, I empty it about once every 2 weeks. I don't notice any smells in my house except for after I clean it when I smell some of the chemicals I add that help brake down the future waste. I bought the Thetford eco-smart free and clear deodorant which is supposed to be safe for septic systems. (The other option is using deodorants with more chemicals and emptying them at RV dump stations or in sewer connected toilets.)

The Cleaning Process
Almost time to empty!
Emptying into septic cleanout
Cleaning out waste tank
Adding water to the freshwater tank (deodorant also, not pictured)
Waste tank (left) and Freshwater tank (right)
Good to go again!

New Tinys in the Yard

This past weekend, I helped move two new tiny homes into the yard where I had been living for the past two years. Both homes were being built at Green Anchors (my build site as well) but the builders were ready to relocate into their future living spots. They hired a towing company and early Saturday morning (7:30am!) the first house arrived.
Since this house was going to be located at the front of the yard next to the fence, the plan was to drive in forward and then back the house into the prepared spot. Driving in want fairly well though we needed to add some blocks under the tires due to the steep driveway (but hey, at least it is graveled now!) The driver also avoided trampling most of the garden which meant a little less space to work in. Luckily he had a towing receiver that could adjust the tongue left to right, up, down, forward and backward.
We also ended up using the borrowed power mover to help steer it into place. We operated it on top of scraps of plywood to keep the wheels from spinning in the soft ground. It was really great to have seven people be a part of this move process especially as we had to keep shifting the plywood scraps in front of the power mover's path and keep an eye out to avoid any collisions.
With the first house in place, the truck driver was off to grab the second one and we spent the time doing a little site work to re-level out the ground. We also took a break to eat bagels with various spreads including nutella!
Before we knew it, the truck driver was back with the second house in tow. This one he backed into the yard and it was fun to see the two homes side by side for a minute!
We had to complete the move with the power mover due to yard obstacles but that went smoothly due to the plywood. I still think we need a version with spikes for soft ground though!
By early afternoon, the yard had transformed to a little tiny house community (or future community since they are all still under construction). It will be neat to see the progression of that space over time.

Portland to Mosier: Tiny House Move #2

 A couple of weeks before the move, I purchased a new 5'x8' cargo trailer which would serve as a space to transport all of my outdoor items to the new space and then as an organized tool and gear garage once I settled in. I decided to purchase a trailer that I could stand up in with both a back door and side door for better functionality. I purchased it from Trailer City in Portland and worked with a guy named Larry who had a good sense of humor and was helpful in selecting the trailer. He even threw in a 2" ball hitch since I only had the 2 5/8" hitch for my house trailer. Back at the yard, I learned that backing up a shorter trailer is actually more difficult than a longer one because you have to constantly turn the steering wheel to get it to go where you want. I also learned that, when empty, I could physically move it myself.
Once I had it set in place, I started loading all of the things I had been storing under my trailer (tools, materials, tarps etc.) as well as my solar panels, ladder, tongue roof shelter and RV stove set-up. I also packed up many things in my house including fused glass and ceramic things I had made, everything on the open kitchen shelves, toilet, books and more. I didn't design with all the features included in more portable dwellings because I don't intend to move often. I used a couple of ratchet straps and cardboard to tie the fridge and cabinet together and to keep the cabinet drawers from opening. I crossed my fingers that my little point of use water heater would be ok to stay connected and full of water during the move (and it was thankfully) since I wasn't sure how to drain it without getting water everywhere.

During the week before I moved my house, I went to the Hood River DMV and asked for a trip permit. I was surprised at the ease of that process. All I did was tell them I needed a trip permit for the weekend I planned to move and give them the certificate of origin for my trailer, then they filled out the paperwork, collected my $30 and I had permit in hand!
I got up early that Saturday morning and with the help of a friend, lowered the house off of the block stands. We started at the tongue end first, lowering the tongue jack and then jacking up the house a little with a car jack to get the weight off of the block stand. Once free, we removed the wood shims and concrete blocks, released the car jack support, then moved on to the other side and repeated the process. The weight of the house was a little too much for the tongue jack so we propped it up on a large block of wood. Then we went to the back of the house, jacked it up to remove the shims and blocks until finally the weight of the house was on the wheels again.
We used a borrowed power mover to rotate the house a little bit away from the adjacent building but it was a challenge since the wheels were still in the huge ruts from the wet move in (we back-filled some before we lowered the house). Luckily we were able to move it enough to back my truck up to the tongue and get it hitched up. I was a little nervous about my truck's ability to pull my house out of the ruts and out of the yard but all went well, no problem at all. I took the house around the block for a test drive, then we checked the brakes and signals and filled the tires with air to 50 psi (they were at 40 psi). Finally, we were ready to hit the road!
After a few blocks we merged onto the freeway and drove out to Troutdale where we made a pit stop at the TA scales to weigh the house and truck together so that on the way back we could reweigh just the truck and calculate the weight of the house. They gave us free coffee for our first weigh and then we were really off!
I had moved the cargo trailer out to the new site during the previous weekend so I had a feel for what it would be like to tow something behind my truck on the same route. However, my house was much heavier and I kept my speed to 45-50mph to avoid fishtailing. The drive went smoothly even up the steeper sections of the road outside of Mosier. All paved except for a little bit of gravel at the end and a narrow windy driveway that the wheels neared the edge a little too close for my comfort at one point.
Once on the main part of the property, we had to back it into place so I got to work on my trailering skills which were very limited so that ended up being the most stressful and frustrating part of this move. Eventually I got it into the place I wanted. Then we jacked it up on blocks again but this time I bought the 8"x8"x16" blocks so we could set two side by side in one direction and then rotate the second layer 90 degrees so it creates a square block stand. We did some basic leveling with plywood and wood shims of various thicknesses but I forgot to bring my 4' level along so would probably need to do a better leveling job at a later time. We plugged in my power cord to ensure that I could have light and then called it a day with pizza, cider and a dip in the river as a reward!
Oh, and we learned that my house with most of my things in it surprisingly weighs around 9,000 lbs!

Budget

16' Tandem Axle 7,000 lb. GVWR Trailer from Iron Eagle Trailers - $2,610.40
4 Husky Scissor Jacks - $149.90
Milgard Ultra Series Fiberglass Windows (3) 24"x30" RO and (2) 48"x18" RO - $1965.13
Codel Fiberglass Door - $479.46
Taylor Metal Roof - $461.41
Roxul Exterior and Interior Insulation - $793.47
Steel Loft Joists - $200
Steel Loft Ladder - $500
Steel brackets for farm sink - $440
Farm Sink - $95
Stainless Steel shower pan - $600
Bosch Tronic 8gal. water heater - $259.95
Panasonic WhisperWall bath fan - $173.90
Polycarbonate Door Awning - $300
House Shell - $3,706.32
House Interior - $6,485.21
Solar - $2,000

Total Cost - $18,477.57

Moving Considerations

So I started a new job on August 1st as a Project Manager for Green Home Design + Build in Hood River, OR! In the 8 years I lived in Portland, I fell in love with the Columbia River Gorge; cycling on the old highway and hiking in the forest amidst thundering waterfalls, native wildflowers and sweeping vistas. I knew that someday I would want to leave the city. For me, Portland had reached that tipping point with the overwhelming amount of people moving in, clogging the roads and dramatically increasing the cost of living. Rent is now double what it was 5 years ago and wages haven't kept up. Having sensed this population growth trend and realizing that I would never be able to afford a house in Portland is part of why I chose to build a tiny house on wheels two years ago. My plan was then to save up money to buy land in the Gorge and then move my house out there to live in until I built my dream strawbale home. The move timeline accelerated as an erratic work schedule instigated putting feelers out to the communities in the Gorge. Before I knew it, I was offered a job that not only pays well but also advances my career, where I am able to draw upon my varied work experiences to create new programs and manage construction projects.
Working in Hood River while my house is in Portland presents some challenges such as the fact that I chose not to commute everyday and instead camp out of my truck. I recently bought a canopy and plan to build out the back eventually once I figure out how I want to use the space. Camping out of it during the week has worked out quite well so far since I have found a mountain bike area where travelers are commonly sleeping in their vehicles. I have also slept near the waterfront event site which is another popular spot for people staying overnight. I found a yoga studio with a shower, cook meals on my camp stove and have access to a fridge and microwave at work. It has been relaxing to get out of town after work, set up camp and read a book in the evenings. Though it has also presented the challenge of not being able to spend time during the week preparing my house for the move next month. Weekends have been a whirlwind of preparing the house and managing the garden.
I found a space east of Mosier on a family's 10 acres with a view of Mt. Hood that is mostly ready to move into since it was intended to be their bigger house site but they chose not to build. That means a solid, leveled, graveled pad with water hose connections and septic clean-outs. A PVC pipe was already in place so they just had to run wire and make up a box for me to plug into. They were asking the highest amount of rent compared to the other spaces I had found but were also the most ready to host a tiny house. Other spaces had issues such as access, water quality and quantity, and winter road maintenance plans. Plus, I was hoping to stay on the Oregon side to avoid transferring things over to WA, not to mention better health insurance in OR.
The move is nearing and I'm both anxious and excited for my new life in the Gorge!

Life Outside

Living in a small space works really well in a mild climate where you can spend much of the time outside year round. I grew up in the Midwest, in and out of conditioned spaces during the hot and humid summers and freezing cold winters (though as a kid I loved playing in the snow). I have lived in the PNW for the past 8 years where I have enjoyed hiking in the rainy winter months and campfires year round.
Summertime brings abundance to the garden. In Portland, it's quite easy to grow all the fruits and veggies you can eat and then some! I have been managing a large garden these past 2 years and it has been enjoyable to see things grow and share in the abundance. Last summer I had a part time job so I had more time to water, weed and care for all of the plants. This summer I am working more as a solar installer and also find myself more exhausted at the end of a physical workday to spend much time gardening so it is more neglected than I like. However, things are still growing and producing abundant produce.
I had welded some steel structures for the garden this past winter so it has been fun to see them amidst all of the green as well as to see the one I designed actually function as a trellis for the green beans and cucumbers. This year I even grew a lemon cucumber plant, yum!
I planted more sweet corn in blocks closer together which was successful for better pollination.
The native wildflowers have really taken off this year too though I also experienced Lupine aphids...
More tall and beautiful sunflowers too!
Check out my flickr for more photos!

Living in a Tiny House Q&A

So this weekend marks the two year anniversary of physically starting my tiny house build! With the help of some friends, we built the floor box. If I had it to do over again, I would have framed an actual floor joist system and insulated it with Roxul (which I used for the wall and rafter cavities as well as for the exterior insulation wrap). I really love all of the qualities Roxul has to offer, sound dampening being number one.

Anyway, instead of doing a recap of the build process (since you can read about the different parts in other blog posts), I thought it would be fun to do a sort of Q&A and talk about what it's like to actually live in a tiny house. Please feel free to ask more questions in the comments section and I will respond as soon as I am able.

Here goes...

Q: How big is it?
A: It's about 150 sq.ft. (100 sq.ft. on the main floor and 50 sq.ft. in the loft). People often exclaim "It's so big!" when they first see it and are impressed with the spaciousness of the interior. I have toured several 16' tiny homes and they all felt very different due to layout and materials.
Q: Is it on wheels?
A: Yes, it's built on a 16' trailer.

Q: How long did it take you to build?
A: That's a complicated answer. I began dreaming and designing about a year before I started physically building. I had saved a chunk of money which I hoped to use to complete the shell and make it livable. I did that in about 6 months but the bulk of the shell building I completed in 3 months since I was just working at a job a few hours here and there and could put in 12 hour days building if I wanted. The second 3 months I began working 30 hours a week so I had much less time to build. After 6 months of building, I towed my house to it's current location and started living in it. I stopped building for a couple of months so I could save up more money to continue. I then installed the plumbing and finished the bathroom (3 months in), installed the electrical (9 months in) and solar (10 months in), completed the kitchen cabinet (11 months in), and finished the barn door and storage cabinets (17 months in). Finishing out my home has been a function of money, time and design. I could have completed projects sooner if I had the money and time but since I didn't have those things, I was able to spend more time thinking about and experimenting with different options while I lived in it. For instance, I had originally planned a daybed/storage box in the "great room" but then I decided to buy a full size digital piano and built my kitchen cabinet with a cantilevered countertop to accommodate the saddle style stool I love so much. Both of these things filled in the space of the planned daybed and my closet could only handle so much storage, so I built a couple of open boxes for my outdoor gear storage. I designed them to match the kitchen cabinet I made with a welded frame and red stained wood infill panels. Most of these components were not designed for frequent moving and it will be quite a task to secure everything for a move but it's not something I plan to do often. I am at a point now that I consider it done. As with any home, there is ongoing maintenance like replacing water heaters and refrigerators (which I may do and get electric/propane combos), changing door hardware and getting rid of things you no longer use. I have the components to add an exterior outlet but haven't had a need for that yet so will install when/if necessary. I may also swap out the wood supports for the solar awning with aluminum unistrut or rail or I may just disassemble and reassemble the system when I move.

Q: What's your favorite part about it?
A: My loft and the ladder. I'm really proud of the design/build of the steel cantilevers with the fir treads. I also really love my kitchen farm sink!
Q: How do you cook?
A: I have an induction cooktop that pulls out on the top shelf of my custom built cabinet. I also have an RV/boat stove with cooktop and oven that I like to use during the warmer months to keep my house cooler and because it's fun to cook and bake outside. In addition, I have access to my yardie's grill and I plan to buy my own because I really like how easy grilling is and the way the food tastes.
Q: How does your toilet work?
A: I have a simple bucket compost toilet with a Separett insert which divides #1 and #2. I currently just use it to pee in since we decided not to manage humanure on site. I have access to sewer connected toilets for #2.
Q: What's it like to shower in your house?
A: I don't because I am worried about the amount of moisture it would create and even with a bath fan I still see potential mold issues due to the tightness of my air barrier. We built an external structure on site that includes a shower and laundry facilities. It has been wonderful to shower this way even in the cold of winter (PNW style, relatively mild with occasional snow) and even uninsulated because the cedar really helps the space warm up quickly.
Q: What is your greywater system?
A: Both my house and the yard structure have a bucket system where water enters a stack of 2 buckets from near the top, is then filtered through sawdust (again cedar is really great, especially incense cedar) and window screen mesh through many small drilled holes into the bucket below. That bucket is attached to another one farther away with a 10' piece of ABS pipe and fittings to give a good seal. The final bucket is filled with rocks and also has drilled holes in the sides and bottom to disperse the water into the ground. The final bucket is completely buried and we haven't tried digging it up yet to see how that part is working. We have cleaned out the first bucket occasionally and decided it would be best to try to do that monthly so it isn't as gross. What we usually do is throw away the sawdust part (though I have composted it once) because otherwise it can really make the yard smell bad. We hose off the screen, bucket and cover and leave to air out in the sun for a day. Then, we put the bucket back in place, add the mesh and the sawdust. Other options could be to build a french drain and/or filter the water directly through soil to water flowers or veggies.
A few other things...

It's really awesome to have electricity that powers my whole house (after 9 months on an extension cord), some of it even powered by the sun.
Also, running water, and HOT running water!
Creating a place for everything and giving away things I no longer need or want.
On partly cloudy days when the sun comes out from behind a cloud and warms up the fir when I am lounging in my loft...and then the glow fades behind another cloud...I could do nothing but watch for hours, really magical.