winterizing

Wintering in a Tiny Home

tiny house
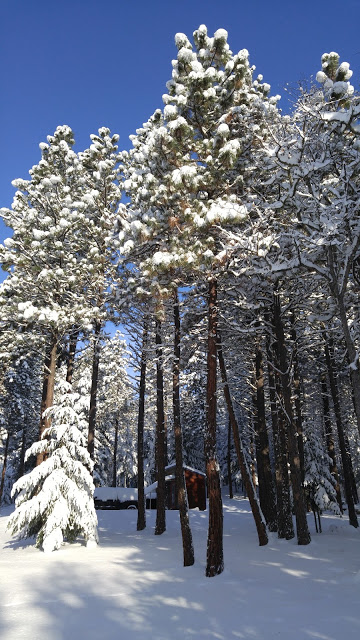
Wow, what a crazy winter we have had this year! When I first talked to the people who are hosting my tiny home and me, they told me snow was more of a novelty than the norm. So I wasn't expecting multiple snowstorms, feet of snow on the ground for months, and days when I couldn't get to work because I had to wait for the rural roads where I live to be plowed. They say this has been a record winter, worse than any in 20 years, so maybe I should consider myself lucky to have had this experience. Don't get me wrong, snow can be beautiful when it's falling and waking up to a blue sky and snow topped ponderosa pines is downright magical. It's the cold, the shoveling and the treacherous road conditions dealt with on a daily basis that remind me why I moved away from a snowier climate. Can you tell I'm ready for spring?
tiny house
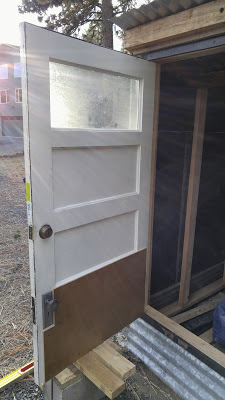
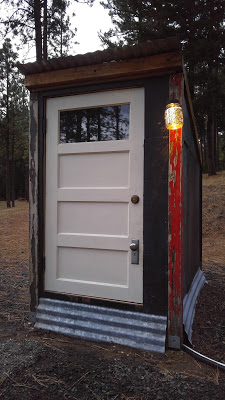
I am happy to say my tiny house has held up to the snow and below zero temps. Well mostly. My cantilevered door awning did manage to build up enough snow to split and rip apart the siding and furring strips I had lag screwed it to so I'm going to have to do some repairs to get it reinstalled. Luckily I had added a 2x4 across the horizontal supports so the polycarbonate didn't break.

I did invest in a heated water hose this winter and it was the best decision I could have made. For around $100, I have had running water all winter long. We didn't end up installing a frost free hydrant but the utility shed structure and a little bit of insulation around the water hose connections were enough to keep the line from freezing. I had guessed that I would be dealing with colder weather for a longer period of time than I had in Portland, and boy was I right! I highly recommend buying and using one if you live in a climate with below freezing winter temps.
heated water hose
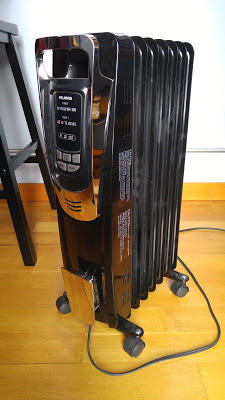
Also, I bought an oil filled radiant heater to use as the primary heat source for my home. I usually had it set on the low or eco modes at 65 degrees (the lowest temp possible), and that was more than adequate to keep the house warm even in sub zero conditions.
oil filled radiant heater

Winterizing: Utility Shed Build

One of the reasons I chose my new site was that it was pretty much ready for me to hook up and live. What I didn't realize was that I would need to build a structure to help protect my power, water and septic connections from cold, snowy periods during the winter time. Luckily I was able to scavenge used building materials from site, along with some extra 2x4s I had lying around, the shed roof I had installed over the tongue of my trailer at my last site along with the concrete pier blocks and extra fasteners left from my house build. I did buy a used door from the ReBuilding Center, new backer rod and caulk which put the total material cost at around $30.

Since I already had a pre-assembled roof component, I used that as a reference for setting my foundation. I dug out the four corners so the pier blocks could sit on native soil and be backfilled to ensure a solid foundation. Then, I installed the two vertical 4x4 posts (my old solar awning support posts) on the pier blocks at the taller end of the shed. Next, I built the shorter end wall with 2x4s and the black ABS-like sheet material (from a previous skate ramp on site) and installed it spanning the other two pier blocks. Luckily the roof was light enough to pick up and set atop these vertical supports without too much struggle. Once in place, I double checked plumb and level and then secured with screws.
I moved on to frame the side walls in place and attached the panels. The panels were a little tricky to work with since they weren't perfectly square or the same size and I didn't have a good way or the patience to make them uniform so aesthetically they are a little funky but they function.
The next step was to build the frame for the door with a smaller rough opening since the door I bought didn't have a jamb and I didn't feel like buying or building one for this custom size. The door I bought was actually taller but had a cutout for a pet door so I cut off that lower section. That made it just about the perfect height for my structure, though the handle is a little low (more funkiness). I learned that the square strength from panel doors comes from the side stiles and the top and bottom rails and was advised to add a piece of sheet good to span the lower two rails and panel.
With the frame built, I screwed it in place and then went to work hanging the door. It's a little more difficult to hang a door without a jamb, especially by yourself, but I have learned to use other materials as support. Some shimming required.
With the door in place, I used backer rod and caulk to seal up the seams, then backfilled in around the perimeter. Inside, I plugged in a work light, installed a hose hook to hang my second water hose (for rinsing things off and cleaning my toilet), added a lock box with an extra key to my house (been thankful to have had this more than once), hung my mailbox and owl lantern.
On the outside, I added my solar lantern to help navigate at night!
Additional steps I may be taking are installing a frost free hydrant on the water line, adding insulation to exposed fittings and switching over to a heated water hose during colder conditions. The other option is draining the water from the lines and turning it off during freezing temperatures but I'm not sure that I want to go that route since it will likely be a longer period of time than the week or so of frozen hose I had experienced in Portland. I also thought about skirting my house but getting a tight seal is near impossible to do and I don't want to create a home for critters. Plus, I spend most of my time at home in my loft so am not standing on the cold floor. Stay tuned for winter weather living updates!