
Wow, it's been a month since my last blog post! Sorry to keep you all wondering what I have been up to on what I am now calling the "micro house". I like the term "micro" because it goes beyond the term "tiny" since it offers a comparison, indicating something smaller that the average scale. My goal in building a micro house was not primarily to be part of a movement, but to build a simple, decent, affordable home where I could apply my experience in design and building to create a space that is my own. I work in the energy efficiency field as a home performance consultant and meet with homeowners every day. Listening to their concerns, needs and values, I realized that I did not need or want to maintain a larger space. It could be convenient to have a larger house, even just a two bedroom, so I could use that extra space to accommodate guests, as a yoga room or as a home office. But then I wouldn't be faced with the unique design challenge of living in a smaller space where everything (mostly) I own is meaningful and has its own place. Pretty neat. Ok, on to the house projects...
 I have been working more at my job lately as well as setting more time aside to volunteer for causes I care about, exploring the outdoors and squeezing in some self care activities including hiking, aerial yoga, soaking and massage. This year, my educational goals are to get more involved with the aerial arts, practice raft guiding (from my training last spring) and learn how to weld (all types). I'm so excited to do all of these things but I've still got one main component of the house to complete: electrical. I have been doing some planning like calculating all of my appliance and plug loads and also mapping out where I want outlets and switches via post-it notes in those locations. We have been building a utility shed which will house the yard sub-panel. That is where I eventually will be plugging my house in for power. My yardie has an electrician friend who is helping us with our plans so more on that to come.
 I also have been talking to a friend who I met through Cycle Oregon this past fall about getting solar for my house. He had rigged up a solar charging trailer for the event so I figured he would be a great contact to help me design a portable system. I met with him today at his home to check out the components of the proposed system which was very exciting! The system will be stand-alone with batteries, not grid-tied, and I will be able to add on as necessary. Currently, I live in the middle of a city so I do not need solar for power but I like the idea of reducing my impact on the grid. I also plan to move to a more rural area in the next five years where I would like to be independent of grid power.
 What else? I bought a small dehumidifier to help remove moisture (from breathing, cooking and from having a window cracked open for my extension cord) since I don't have my bathroom exhaust fan installed yet. Moisture hasn't really been an issue when it's just me spending time in the house but becomes more so when others are sharing the space. Guess I did a great job of air sealing and insulating! Anyway, the dehumidifier uses peltier technology, not a compressor, so it's barely audible. It can hold up to 16oz. of water before it needs to be emptied which I thought would be necessary every day or two but I can usually wait several days before it is even half full. I have it up in my loft at the moment which I think will actually be a good place to keep it.
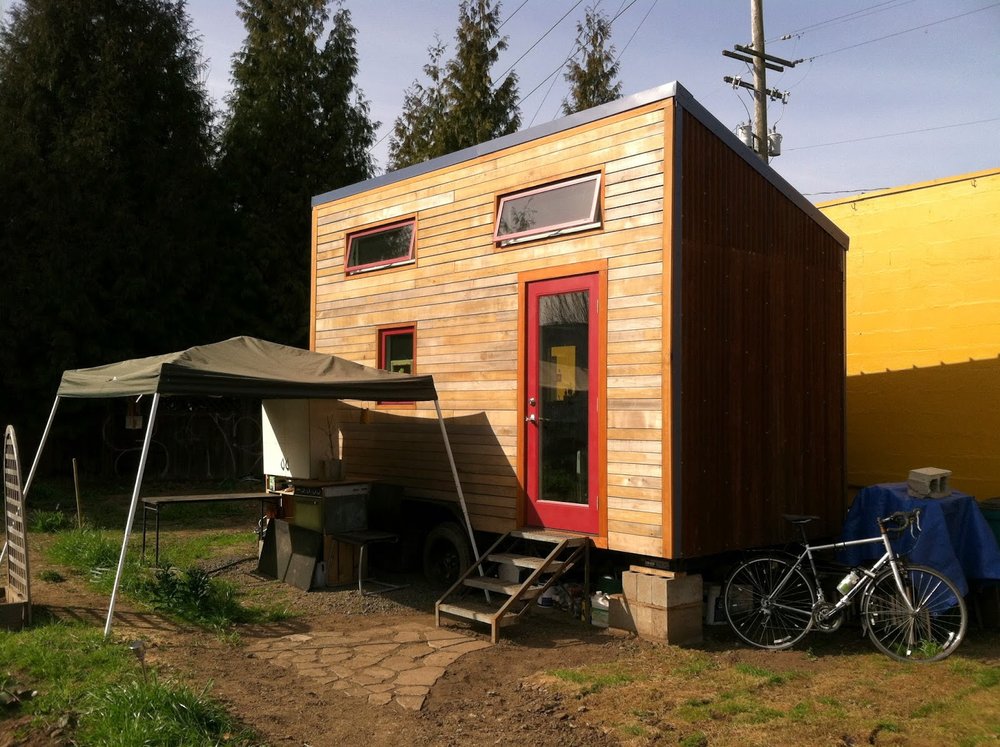
 Outside my front door, I added more dirt and set the feet of my steps on bricks so they are now level and not sinking into the ground at an odd angle. I scavenged the yard for random chunks of urbanite to use to make a patio of sorts in front of the steps which will hopefully help me drag less mud inside and also elevate that area so it's not a mud puddle when it rains. The ideal way to complete this process would be to dig out 4-6" of soil and create a level surface. Then lay down weed barrier, sand and/or gravel, the urbanite pavers and finally pebbles in between the chunks. Since I know what needs to go into that process and also taking into account the varying thicknesses of the urbanite, I decided to just set them in the dirt. This method actually took more time than I imagined it would since the pieces would rock if not packed tightly with soil. Eventually, I got them all in place and a few days later, I received a present of ground cover, Isotoma fluviatilis, from my yardie to fill in the spaces between the urbanite. It's a little bare at the moment but it should grow and extend to fill in.


 That's all for now folks!