After picking up some reclaimed corrugated steel siding from Aurora Mills Architectural Salvage and some cedar siding left over from a friend's house remodel a few years ago, I was excited to get it installed on my house. I had originally thought I would put vertical corrugated siding on the tongue end and then run it horizontal on the short long wall with open joint cedar siding on the tall long wall and back end. However, a friend suggested putting the corrugated on the two long walls which made me think of putting it on the two end walls with cedar on the two long walls so I would not have to deal with cutting and flashing around the windows. I would, however, be challenged with cutting diagonals to match the slope of the shed roof.
A friend and I installed the eight 2'x8' panels in a few hours which probably could have went faster if I was not so meticulous with it being plumb and level and matching the existing structure. I put off figuring out, cutting and installing the top angled pieces until last weekend when I took the measurements and drew the sketches I needed for each of the eight pieces. I attempted to use an angle grinder to cut the line I wanted after the piece was clamped to the table with a sacrificial guide. However, since I am new to metal working, I was unprepared for the amount of sparks created and the sounds associated with cutting steel. I also felt like I needed my sturdy Carhartt pants to better protect myself so I decided to postpone it until yet another day. One of the founders of the site where I am building who is a welder offered to help me cut the pieces one evening but he ended up having other commitments so yesterday I decided to buy a metal blade for my circular saw, put it on backwards as suggested for this task, and go for it! At least the circular saw is a tool I am familiar with and it has a fence to better guide the blade through the material. Still a bit intimidating though.
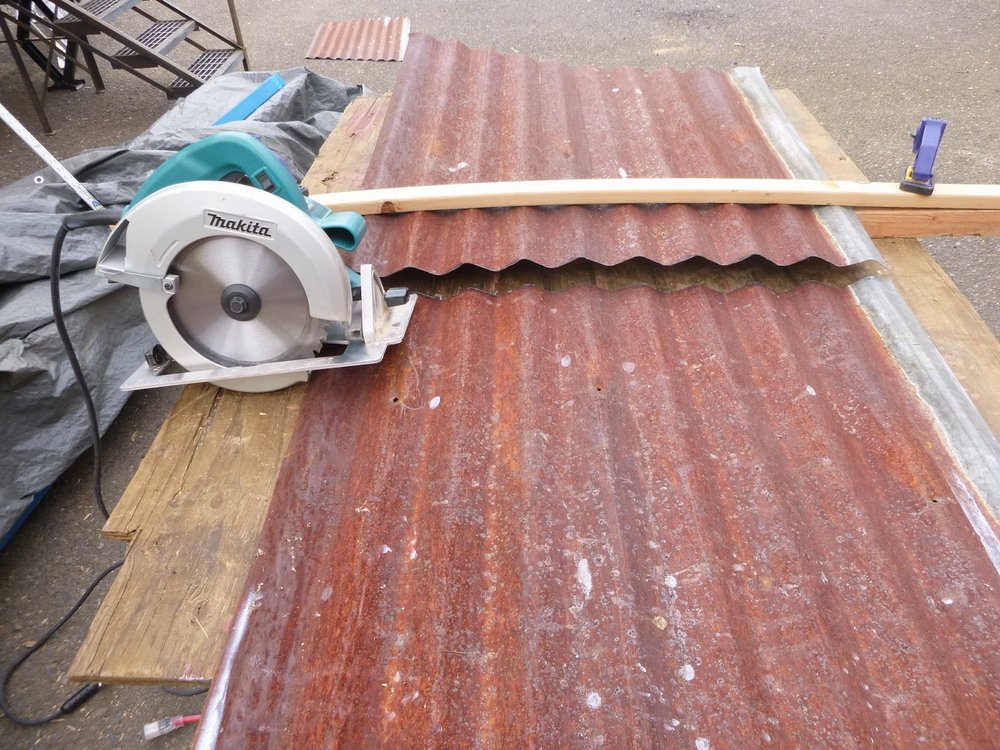
I marked my cut line on the corrugated and then clamped down a piece of wood to guide the saw fence in a straight line. Then I put on my safety glasses, ear muffs and leather gloves (one time where gloves are necessary when using a saw), started the saw and made the cut. I definitely felt an adrenaline rush the first time through as I was unsure how the saw would react to the steel. I was told it would cut like butter and while I did not find that quite true, it was just fine. The sparks flew to the opposite side of where I was cutting and it cut through the corrugations somewhat easily though the blade wanted to tilt the saw when going over the ridges. I made the cut on the finish side so the burrs were left on the backside. I think if the saw blade was put on in the other direction, the burrs would have been on the finish side.
I made all of the perpendicular cuts this way and then used right and left handed snips to hand cut the diagonals just to see what that was like. I actually liked using the hand tools because it was quieter, didn't use as much energy and felt safer. They also did not leave burrs which I had to file off from the circular saw cuts. The steel I have is pretty thick, probably about 22 gauge. The newer stuff is much thinner and so cuts easier. This experience has made me feel less intimidated to install my roof which is also metal.
The cedar siding I picked up from a friend was sitting outside covered for the last 3 years so it had a slightly weathered look to it. Much work had already gone into preparing it to be used as siding including jointing, planing and ripping to the final dimensions. Some of it even already had one side stained. I had not planned to stain it so I could watch it weather over time. I did consider leaving the back side stained so it would be more resistant to moisture but then some friends mentioned that wood will cup if you only stain one side. I had heard of the reverse, painted siding that cupped since the back had not been primed, so moisture could cause the wood to swell. This made sense to me along with the fact that I have an air cavity behind my siding which allows moisture to drain and a convection current to dry it out. I sanded the one side that was already somewhat smooth and then started to plane and sand the other side since smooth surfaces repel water easier than rough ones, but quickly realized that the portable powered hand planer we have on site really needs a new blade to be effective in creating a smooth surface. So I just decided to install the boards with the smooth side out.
I used 5d stainless steel siding nails that I found at Parkrose Hardware to install the cedar with two nails through the siding into each furring strip. My build buddy, Lina, later found out that Home Depot carries 6d stainless steel nails after I was going to have to special order more or wait until Parkrose got more in stock. Such a great find! I had friends help me install the longer pieces since it would have been more difficult alone and I installed the shorter pieces solo. It was a little tricky figuring out the spacing of the boards since I didn't want to have to notch around windows and also wanted to minimize the amount of waste that would be created by ripping them down. I also had a limited supply to work with so I spent much more time deciding which pieces should go where which I would have not had to do with new cedar, but the material I found already has so much character that I love. After three trips to pick up the siding, I had enough for both of the long walls and I think they look great!