


This past week, I installed my standing seam metal roof. After trying to just get a quote from Custom Bilt Metals for over 2 weeks and receiving poor customer service, I gave Taylor Metal a call. Another tiny house builder told me to ask for Lewis who was very helpful with his roof. Lewis is awesome! Although the company is based out of Salem, he travels to Portland often and agreed to meet me at site one day to talk about the components of the roof system and the process of installing it. He taught me some tips and tricks of making cuts in the metal and left me with a couple of sample pieces to test out. After he left, I had some more figuring to do to ensure my measurements were correct. I also had to make a decision on color since I had originally wanted a red roof but it was only available in mechanical seam, not the clip lock system. When I was ready, I called Lewis to put together the order and he worked with me to draw up some custom flashing details. With my exterior insulation wrap and rainscreen system, my roof length is 16'7". Since the panels come in 12" widths, I needed special compensating gable flashing that was wider than the standard flashing to accommodate the extra 7 inches. I also wanted the flashing to match up all of the way around. Usually just the ridge and gable flashing do but not the eave. Unfortunately, due to an oversight on the drawing, what was supposed to be 3/16" was written 13/16". So the gable and eave flashings ended up being 5/8" taller than the ridge and they do not match up in the upper corners. Oh well, another lesson learned.


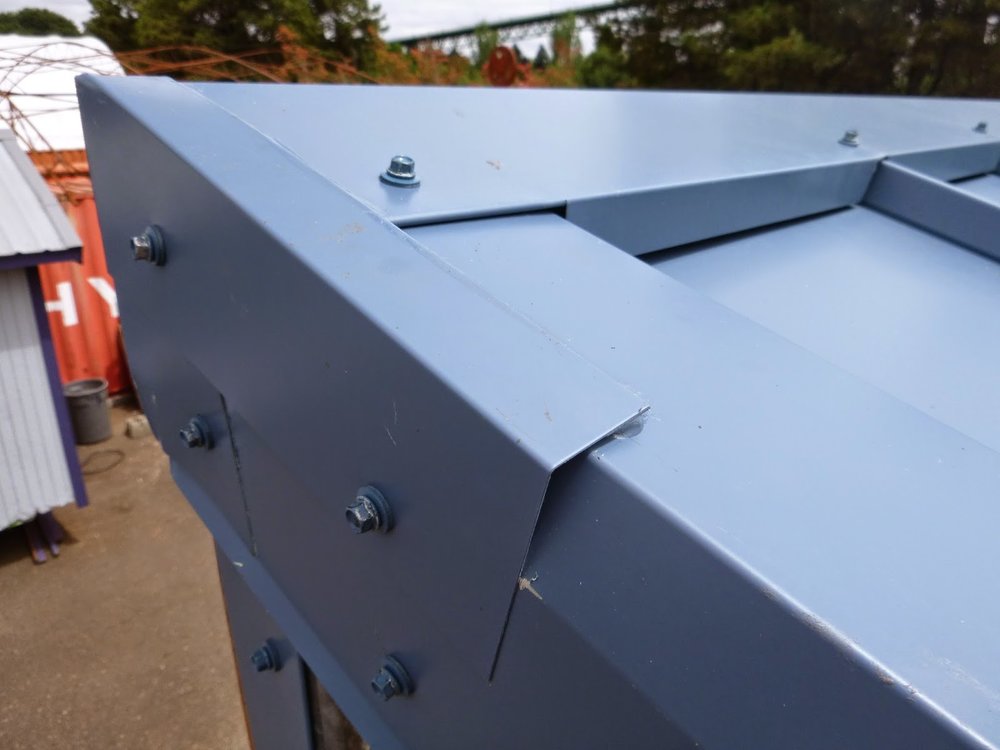
 The final pieces were the ridge finials which I think are more functional than aesthetically pleasing. They are L shaped pieces of flashing that you cut and bend to cap the corner where the ridge meets the gable flashing. Since these pieces of flashing did not match up vertically, I had some custom cuts to make. I think photos are better than words for this so here are a few photos and you can view more on my flickr!


In total, my order consisted of 26 gauge 16 panels, two 10' pieces each of eave, gable and ridge flashing and cost $400. I also had 4 custom L flashing pieces made for the vertical transition from the corrugated siding to the cedar trim which cost $60. I figured it was worth the money to have pieces of flashing that match the roof. 24 gauge materials would have cost around $100 more. I finalized the order on Wednesday, they put it together on Thursday and Lewis dropped it off on site on Friday. Now that's excellent and timely customer service!
Install was a little tricky since I had to ensure that the furring strips were all in the same plane. Once that was accomplished, I installed the 2 pieces of eave flashing with the piece starting at the front of the trailer overlapping the one at the back. I used the full 10' pieces and let them overlap in the middle. It was a little difficult to get them lined up perfectly and if I did it again, I would have cut one of the pieces so the overlap was only 6-12".
Then I measured in 3 1/2" in from the back end to mark the start the first panel. Before I brought the panels up to the roof, I cut and up-ended the top end of the panel which acts as a baffle for rain. (I later added Flex Seal to close up those gaps.) I applied a bead of Flex Seal on top of the eave flashing where the panel would rest. I aligned the panel with my marks, letting it overhang off the eave 1" as instructed so rain can drip off. I screwed through each of the slots in the flange which conveniently lined up with my furring strips. Then I brought up the next panel, applied Flex Seal, lined it up, and snapped it in place on the rib of the first panel. I repeated the process with the remainder of the panels.
I installed the gable flashing next, applying a bead of Flex Seal behind the leg where it overlaps the panel rib. I used woodfast screws colored to match the flashing to attach it on the vertical face. I let each piece overhang at the ends so I could figure out what kind of cuts would be necessary to finish it. I decided plumb cut at the ridge and the eave.
 The ridge flashing was the most difficult since I had to notch it around all of the ribs and gable flashing. I did this by setting the flashing on top of the installed pieces and then marked the locations of the ribs on the short vertical section of the flashing. I used right and left tin snips to cut a V for each rib. After notching, I set the piece in place and then screwed through the flashing into the ribs. I cut the second piece to have an 8" overlap and then repeated the process.