


In my last post I talked about fabricating the steel frames for my barn door and gear storage boxes. This post will be about making the infill panels, finishing and installing them.
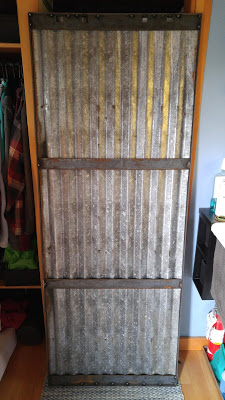
For the barn door, I designed the frame to fit the width of the reclaimed corrugated steel panel so I just had to cut it to the right length to fit inside the frame. I measured and marked the cut line and then used tin snips since I have experienced the most clean and accurate cuts with this method. It's also much quieter and produces no sparks like a cutoff wheel or circular saw. I learned that a plasma cutter would also work but it would produce fumes due to the galvanization. After I cut the panel, I set it in place inside the frame with the rusted side down so the back side, which would face my closet and bathroom, was face up. I cut four pieces of the 3/16" x 2" flat bar I found in the scrap section of The Steel Yard to serve as horizontal backing to hold the panel in place (without having to weld galvanized material to mild steel) and to prevent the center field from bowing. I tack welded one of the backing pieces to the bottom of the frame and one to the top after cutting out notches for the bolts that would secure the rolling hardware in place. I evenly spaced the other two pieces from the center of the frame and tacked them in place.
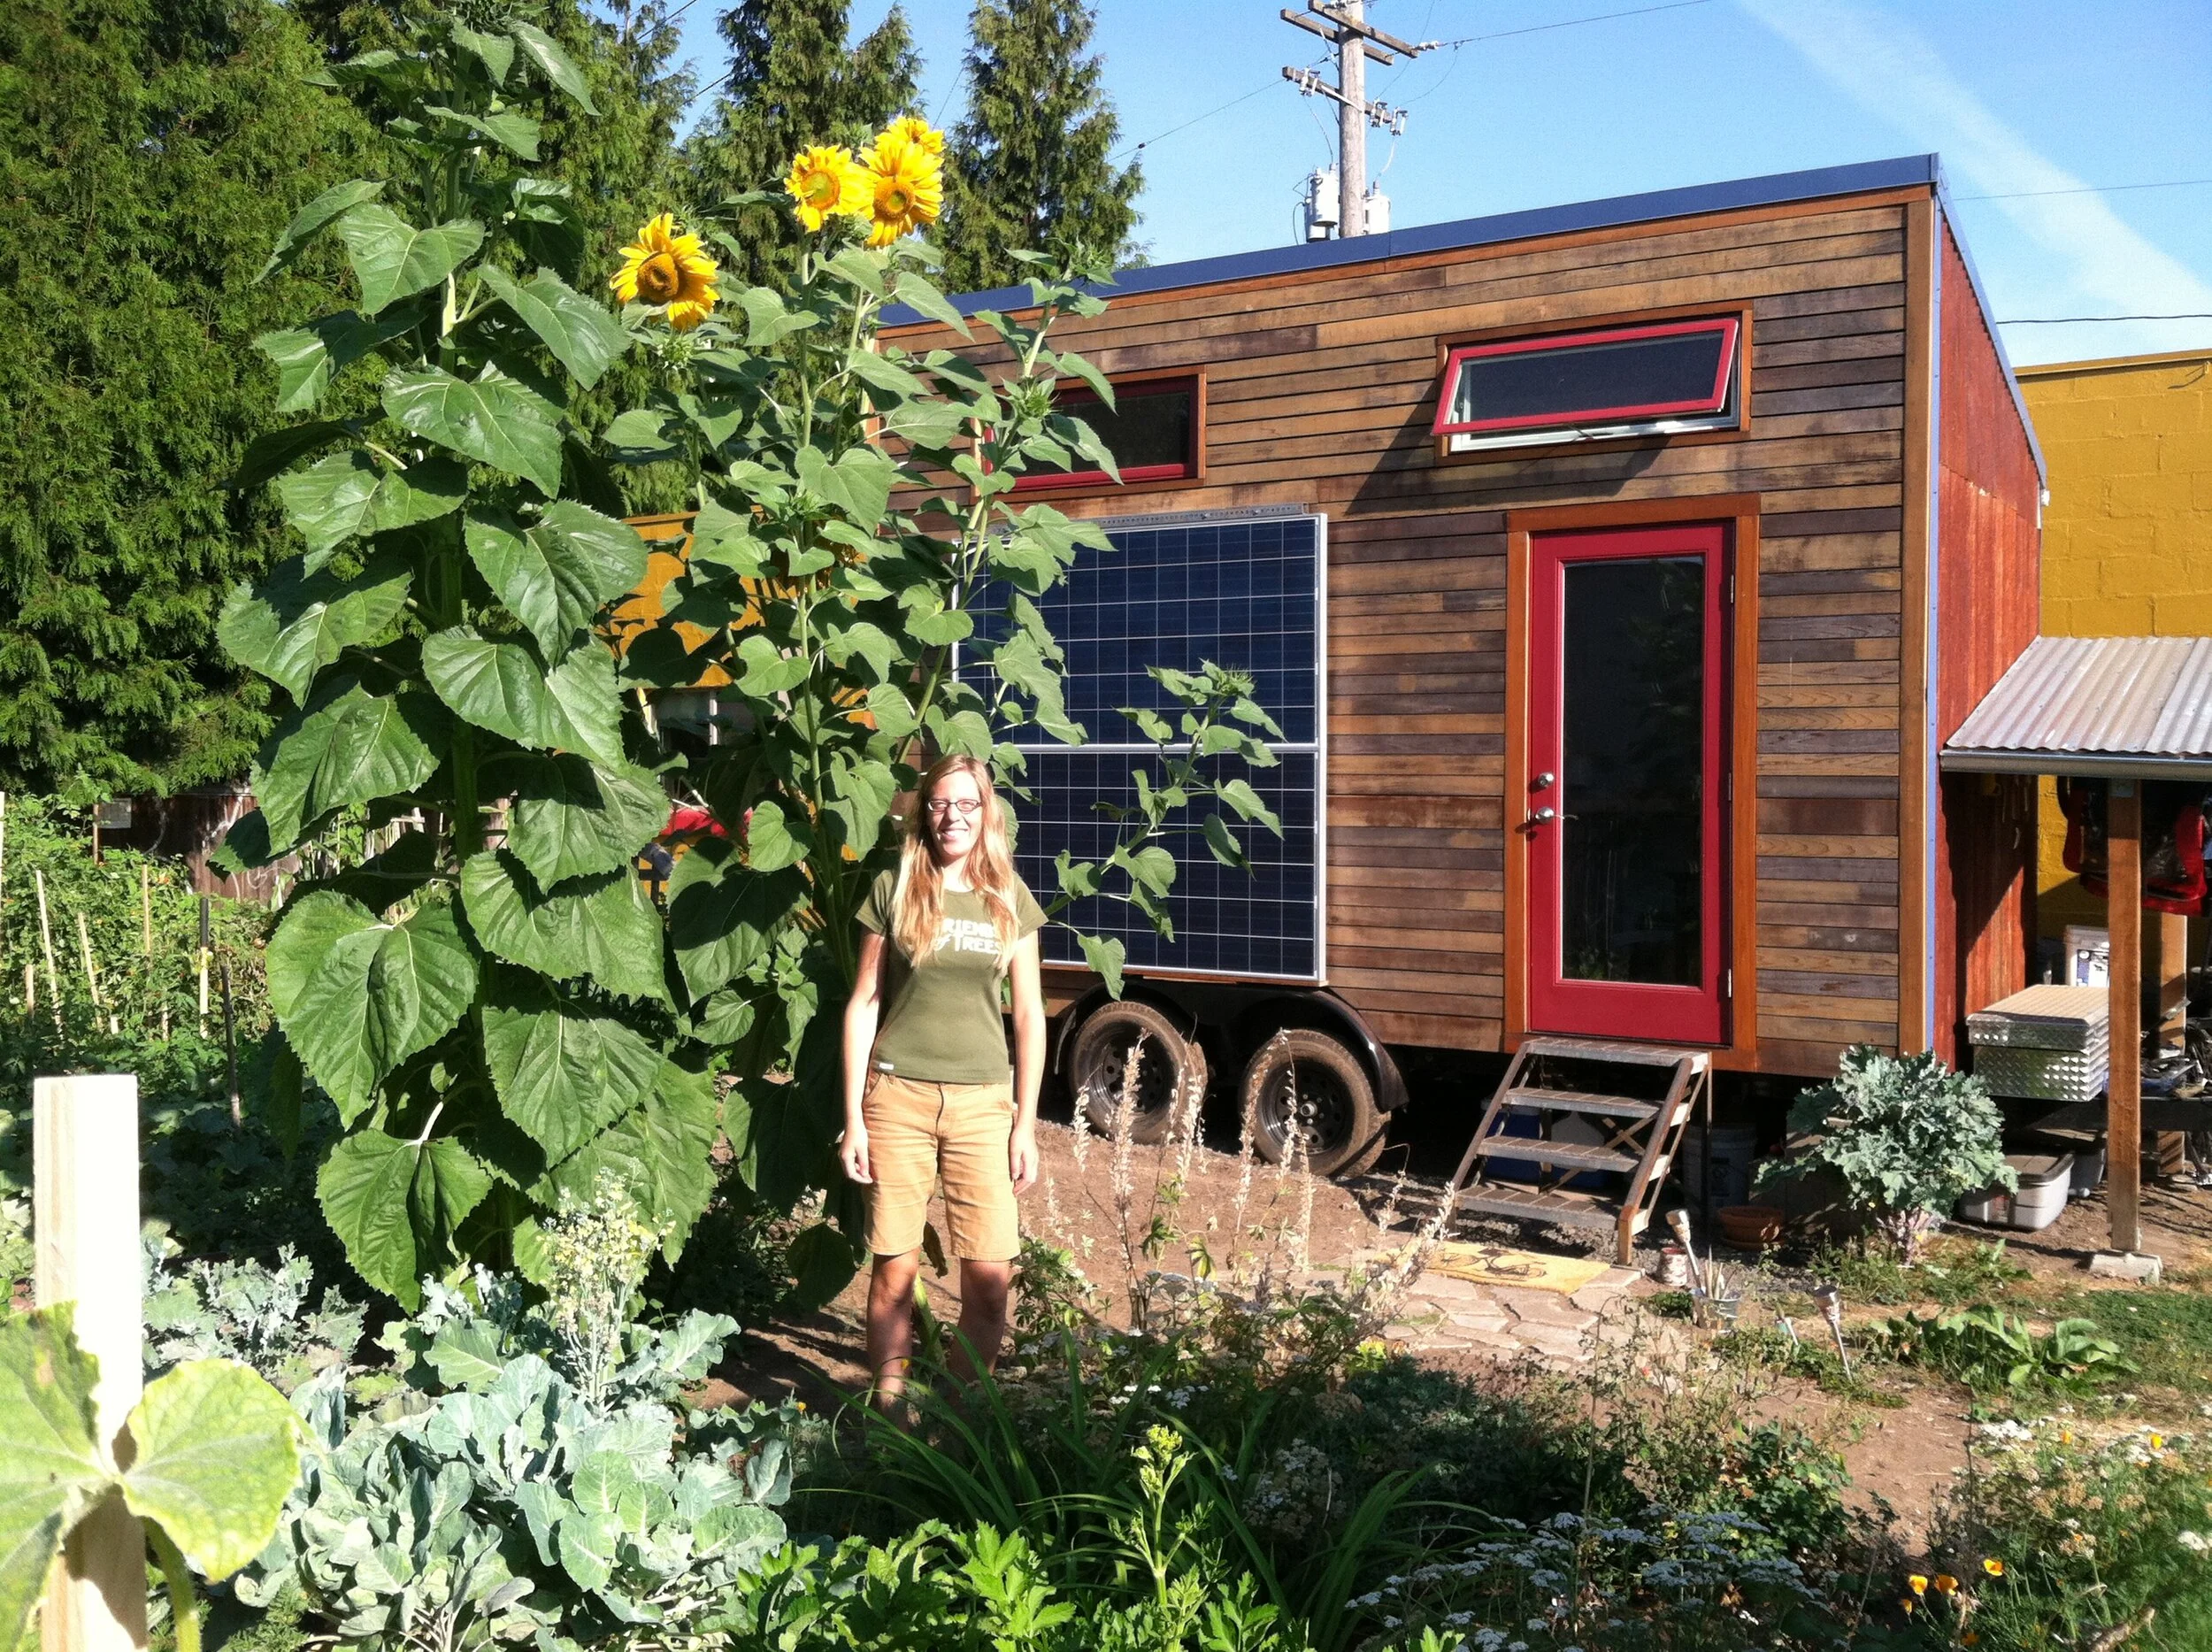
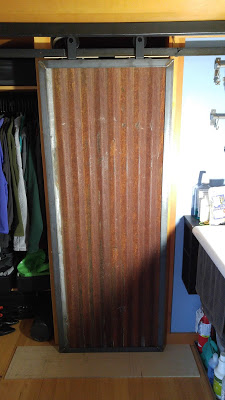
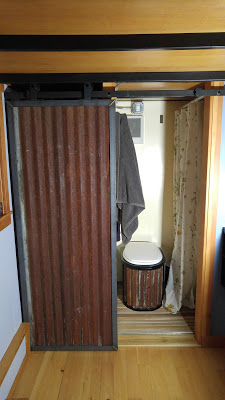
 Once I brought the door home, I attached the rolling hardware with some bolts, washers, lock washers and nuts. Since I was installing solo, I had to figure out how to level and install the custom rail I made (the one that came with the kit just wasn't quite right: holes in wrong places and not long enough to span wall to wall) at the right height so there was a small gap between the door and floor and between the top of the hardware and ceiling. I came up with a clever idea to use a 1/4" thick wood "shim" to set the door on and maintain the bottom gap. Then, I slid the rail in place under the roller grooves with the help of smaller wood shims between the top of the door frame and the rail. I used a small drill bit to make a pilot hole through the rail hole into the door trim, wall and stud. Then I drilled with a larger bit that matched the size of the lag screws which came with the kit. I held in place the spacer between the rail and wall while I hand tightened the lag screw with an adjustable wrench until it was snug. I checked the rail for level and repeated this process two more times for the other stud in that same wall and for the stud in the wall that separates the bathroom and closet. I had to make an extra spacer out of wood for both of these locations so the rail would be parallel to the loft joists and back wall. Then I moved on to the perpendicular end tabs which I secured with shorter lag screws through the wallboard into the horizontal blocking I installed back in the framing stage of construction. With the rail in place, I removed the wood shims and set the door on the track. It is really great to have the door in place! One additional thing I may do in the future is add a clear acrylic lacquer coat to preserve the rust condition and maybe coat the frame black. For now I want to enjoy the raw quality of the frame with the welds exposed and not sanded down.
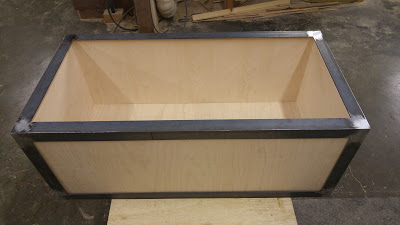
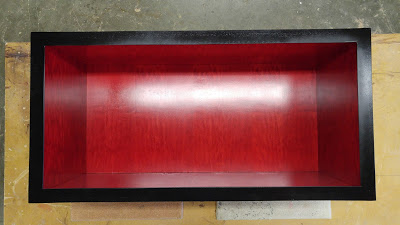
 Now on to the gear storage boxes! After multiple conversations and much thought, I decided to match the infill panels to the red tinted panels of my custom kitchen cabinet. I purchased a sheet of maple veneer plywood from a woodworker friend of mine who helped me rip it down to the pieces from my cut list.
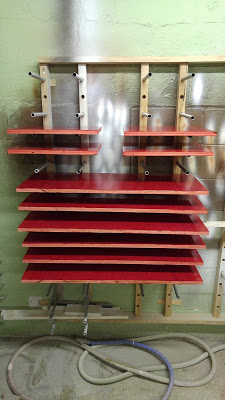
 After test fitting and lightly sanding, I began the water based dye process. I bought a 2oz. bottle of red TransTint and mixed it with distilled water according to instructions on the bottle. I poured the mixture into a spray gun and applied the coat to the first side of each piece. When it was dry, I flipped them over and coated the other side. I repeated the process four more times until the color closely matched my cabinet. Then on to the clear coat. I sprayed two coats of Miller Acriclear acrylic polyurethane varnish on both sides, lightly sanded to make the surface smooth and then sprayed the final coat. Once dry, I moved on to the assembly. During this process, I also can sprayed the steel frames with primer and black Rust-Oleum Painter's Touch 2x spray paint.

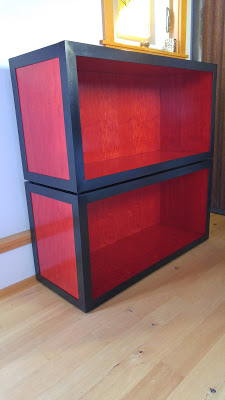
 With those in place, I caulked the back frame perimeter and pressed that piece in place. I caulked and added the two side pieces last and then repeated the process with the other frame. Before installing them in my house, I added small rubber half dome "feet" to each frame corner to prevent scratches between the frames and the floor. In my house, I simply stacked them on top of each other along the wall under my loft opposite the kitchen sink and then filled them with some of my outdoor gear that is not in the back of my closet.
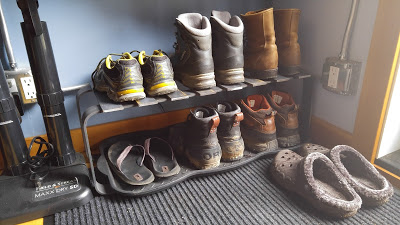
 I also made a beefy shoe rack in the class and some yard art with scraps since I wanted to try out the bender with flat bar and rod.

 More photos on my flickr album!
For the barn door, I designed the frame to fit the width of the reclaimed corrugated steel panel so I just had to cut it to the right length to fit inside the frame. I measured and marked the cut line and then used tin snips since I have experienced the most clean and accurate cuts with this method. It's also much quieter and produces no sparks like a cutoff wheel or circular saw. I learned that a plasma cutter would also work but it would produce fumes due to the galvanization. After I cut the panel, I set it in place inside the frame with the rusted side down so the back side, which would face my closet and bathroom, was face up. I cut four pieces of the 3/16" x 2" flat bar I found in the scrap section of The Steel Yard to serve as horizontal backing to hold the panel in place (without having to weld galvanized material to mild steel) and to prevent the center field from bowing. I tack welded one of the backing pieces to the bottom of the frame and one to the top after cutting out notches for the bolts that would secure the rolling hardware in place. I evenly spaced the other two pieces from the center of the frame and tacked them in place.
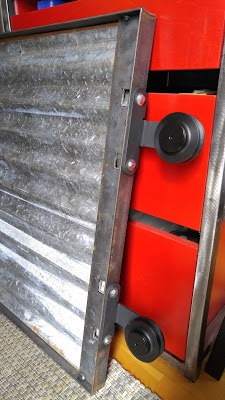
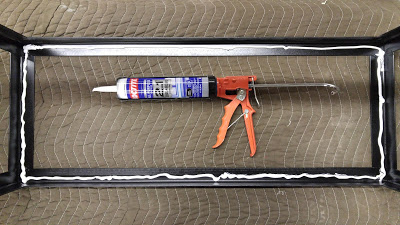
One of the shop guys next door had the great idea of "gluing" the panels to the frame with some kind of adhesive caulk so I wouldn't have to use any brackets and fasteners which would otherwise take away from the clean design aesthetic. Since the frame is the primary structure and I designed the panel layout to support itself, I did not need the extra strength of hardware. So I walked over to the hardware store and they recommended Loctite for its adhesion and flexibility. I bought the clear in case some would ooze out onto the finished surface (which it inevitably always does). I wiped down the frames to ensure clean surfaces then ran a bead of caulk inside the frame along the top and bottom so I could place the frame with the back side on the table while installing both of these pieces.