


With the wall and roof framing in place, we were ready to install the air and water resistive barrier. Since my build buddy Lina had secured a donation of the Prosoco R-Guard liquid applied system (thanks to Tom Schneider of Building Envelope Innovations) for her house and had enough extra for mine, I decided to use it as well. I was a little nervous about using a new system that was different than I have used in the past, but had previously heard about liquid applied WRB systems when I worked for a company who specialized in passive houses. So I did some more research and talked to my Roxul rep to see how the exterior insulation wrap would interact with the R-Guard. He said it would be an awesome building system especially with the addition of the rainscreen siding I have planned. More about the rainscreen and Roxul in future posts.
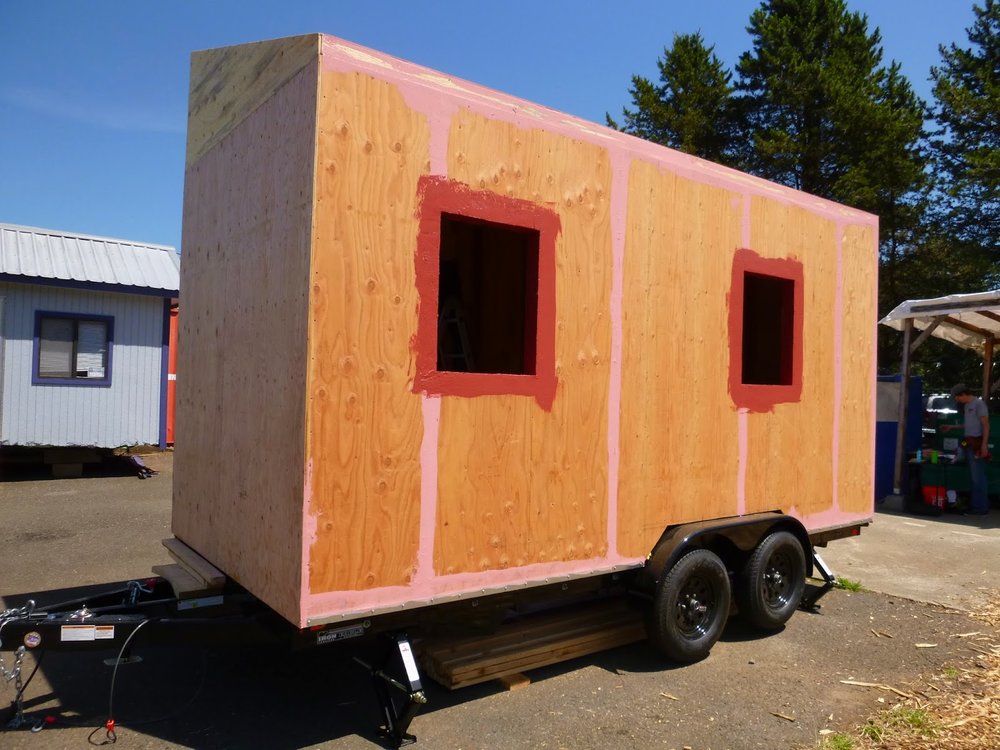
With the decision made, it was time to get to work! I had an awesome work crew out to help and we started by applying the pink Joint & Seam filler to all of the plywood seams. This is instead of the tape typically used. Then we applied the red Fast Flash around the window and door rough openings in the same places you would with the sticky membrane tape, except much easier. Both of these were applied with standard caulk guns and hard tubes or a sausage gun with a sausage like tube. The sausage gun is what the pros use but it was not too difficult to figure out and it creates much less waste! After a bead or squiggle of caulk went down, we spread it out evenly with a flat plastic spreader tool.

The third step was rolling on the orange Cat 5 with paint rollers on the walls. This replaces conventional housewraps. We also applied the Joint & Seam and Cat 5 to the roof after some more hesitation about not using a conventional ice and water shield and then talking to Tom.

By the end of the day, my house looked like an orange piece of modern art! Thanks to all of my wonderful helpers :)
For more photos, check out my flickr!
For more photos, check out my flickr!