
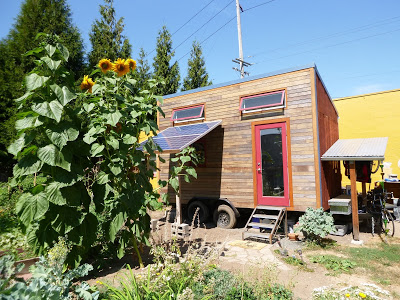
This week we installed my small solar power system! It was very exciting to see this transformation after saving up money for months to finally make it happen. I originally did not plan to install a solar system for this house due to cost and power limits but I really wanted to learn more about solar and create a porch awning which also starts to realize my original design intention: a clerestory roof.
Since I decided to go with an all electric setup, I was somewhat surprised to learn how much power was necessary (to code) to run all of the lights and appliances. Obviously, I only use a fraction of that power most of the time and it makes sense to connect to the grid while living in a city. I do plan to move to a more rural location in the future and at that point, depending on power resources, I may swap out my electric appliances for propane and then use the solar system for lighting and electronics charging so I don't have to rely on grid power.
Tom, who I met while volunteering at Cycle Oregon last year, had his solar charging trailer there and suggested that I make a solar awning for my home. Since he has many years of experience designing and building portable solar systems, I thought it would be awesome to work with him on my project.
The solar power system we installed consists of the following:
The solar power system we installed consists of the following:
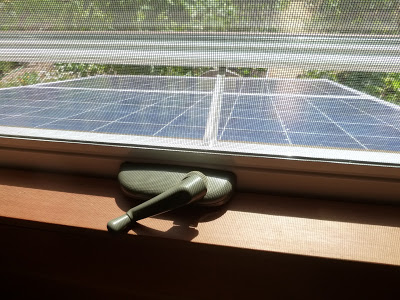
(2) LDK 280 watt - 24 volt poly solar panels
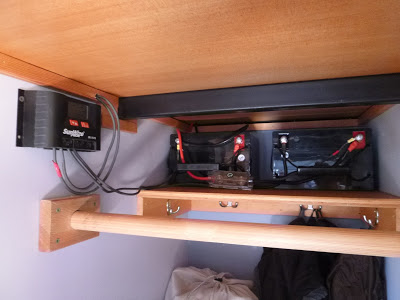
(1) 30 amp / 24 volt PWM charge controller
(1) 400 watt / 24 volt modified sine wave inverter with two 120 volt AC plug-ins
(2) 12 volt deep cycle sealed batteries
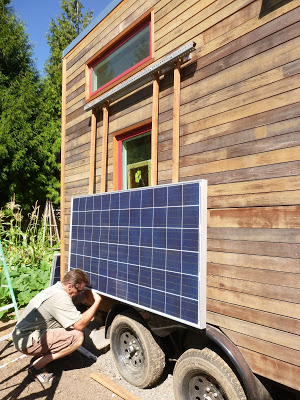
To install, we through-bolted a hinged attachment so that I can fold down the panels during transport and also change the angle of the panels to match the ideal sun angle depending on my location. We used 2x2s to create a lattice frame and connection for the panels to the hinge bar. These may be swapped out later for stronger metal supports. After bolting the panels to the lattice frame, we swung them out and used two 4x4s for support. Ideally the support posts would be adjustable to change the tilt angle for time of year and location to maximize the sun's energy which may be a future iteration.
Then Tom got to work on the wiring. He had to drill a hole through the wall to get the connectors from the panels into the house to the charge controller. The charge controller regulates the power going to the batteries which then supply power to the inverter in my loft. The inverter has two AC plug-ins which I can use to charge my phone, laptop, light, etc. Since the batteries are sealed, we could store them inside in my closet. Tom wanted to keep everything as close together as possible to maximize efficiency.
I am excited to see how this system performs over time and to enjoy a covered outdoor space as the rainy season draws nearer. Check out my flickr for more photos!